ReStored Dresser with Matching Decor
Furnishing a kitchen with DIY projects purchased at multiple Habitat for Humanity ReStores.
Our DIY Guru Fern is a huge supporter of Habitat for Humanity ReStores! Although she normally shops at the Riverside location, she does visit other local ReStores from time to time. These particular projects used products purchased at both the Riverside ReStore and the Redlands ReStore, supporting both Habitat for Humanity Riverside and the San Bernardino Area Habitat for Humanity.
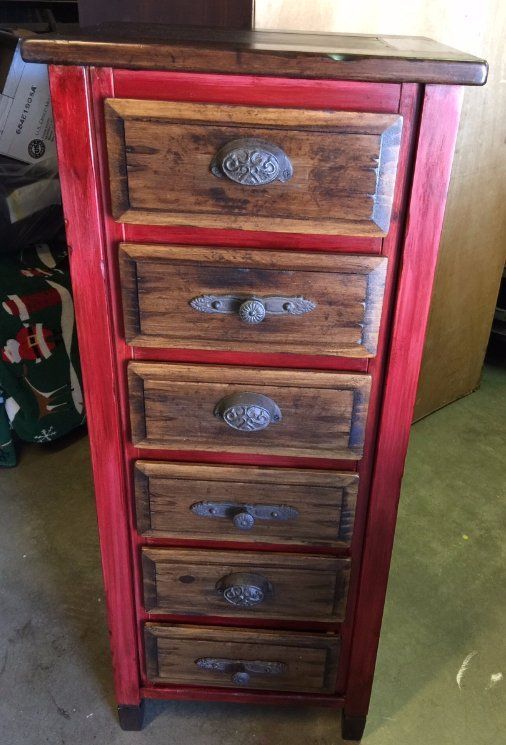
Fern found a tall dresser and a single long cabinet door and was inspired to create a matching set! Perfect for a display in a kitchen or for a party! The pair is just beautiful together.
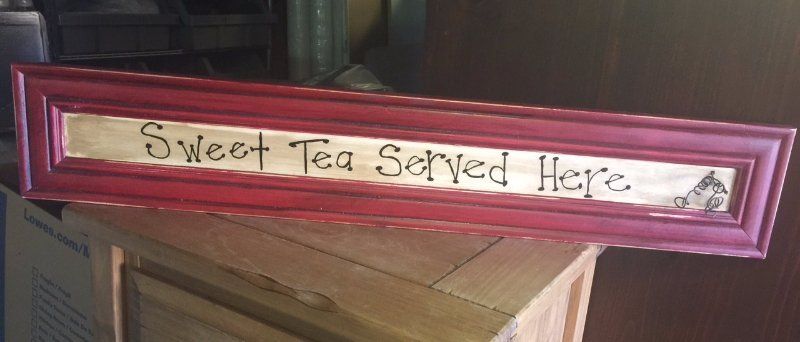
Fern started with a single long cabinet door (purchased at the Riverside ReStore for $2.50). Using paint, wax, and stain she created this beautiful sign for display in a kitchen or at a party. Upon completion of this project, she posed her sign on top of a tall dresser (purchased for only $20 at the Redlands ReStore). She was so pleased with the way her sign looked atop the dresser that she decided to repurpose the dresser in the same fashion to match the sign. See directions for this painting process below.
Supplies:
- General Purpose Paint (Red and White)
- Wax paste
- Stain
- Dark Stain (Fern used Dark Walnut by Minwax)
- (Supplies for additional supplies details)
- Oil Paint Pen
- Wire
- Needle Nose Pliers
Directions:
- Depending on the surface of your piece, you may
want to start by sandpapering the surface and adding a primer (Fern did not do
this step for either piece)
- Water down the red paint so that it is a lighter
consistency. Paint the surface with 2 coats of paint, paint should be lightly
coated and show detail of the wood underneath. (Fern painted everything but the
door front and top)
- Once paint is dry (wait about a day), add wax
paste to the surface of the piece. Let sit then buff it out.
- Apply stain to the surface of the red painted
area then quickly wipe it off to keep the red from losing it’s bright color.
- For area not covered with red, add the dark
stain with Minwax (for the sign, first paint the center with white, then once
it dries apply the dark stain)
For the Dresser:
- New knobs were added to complete the project.
For the Sign:
- “Sweet Tea Served
Here” written with oil paint pen
- Curl Wire with Needle Nose Pliers
- Drill 2 holes into corners of
the sign
- String wire through the holes
to hang the sign on a wall.
If you try this process at home, we want to see the results! Post your projects and tag us using #RiversideReStore. Your creation might get featured in our blog!
Treasure Hunter's Blog